Everything on Docker
4 minute read
Since the early days at CTFer.io, we have always assumed a Kubernetes cluster as the foundation for deployments. This made orchestration simpler and shaped our solutions to run inside containers.
Moreover, we observed that most of the time, a challenge with infrastructure consisted of a single Docker image, exposed on a single port.
Having a load of Docker container, continuously spinning up and down given on-demand usage, was coherent with the orchestrating capabilities of Kubernetes.
We even eased deployment by creating a simplistic recipe kubernetes.ExposedMonopod that was the cornerstone solution to these problems… but the community still was not satisfied by all the requirements for a local lab: setting up a Kubernetes cluster can be quite overkill, or simply too complex.
Indeed, while we are comfortable with Kubernetes, that’s not always the case for our users - mostly student teams or nonprofit volunteers organizing their first CTF, often from scratch.
The goal of this article is to present an alternative to our original Kubernetes-based setup using only virtual machines and Docker. All code referenced in this blog post is available on GitHub, under an open-source license, and can be reused freely.
What’s the Architecture?
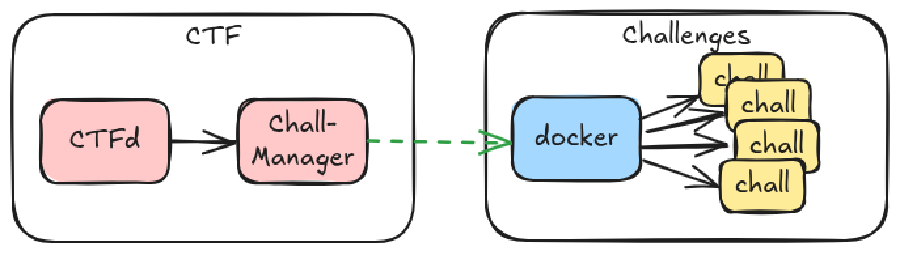
We’ll set up two virtual machines:
- A
ctfVM hosting the CTF platform, including CTFd, Chall-Manager, Chall-Manager-Janitor, and the ctfd-chall-manager plugin; - A
challengesVM hosting the individual challenge instances that will be deployed.
How to Deploy the Platform?
You only need Vagrant and VirtualBox installed on your system.
Create the Platform
# Clone the repository
git clone https://github.com/nicofgrx/ctferio-everything-on-docker
cd ctferio-everything-on-docker

# Launch the virtual machines
vagrant up
Create a Challenge in CTFd
Go to CTFd
Log in with the credentials:
- Username:
ctfer - Password:
ctfer
- Username:
Create a challenge:
- Navigate to Challenge Creation;
- Select the
dynamic_iactype; - Fill in the fields as you like;
- In the Scenario tab, enter:
registry:5000/examples/docker:latest- In Advanced > Challenge configuration, fill the form as below:
hostname:192.168.56.11docker_host:tcp://192.168.56.11:2375

Extract of challenge advanced configuration.
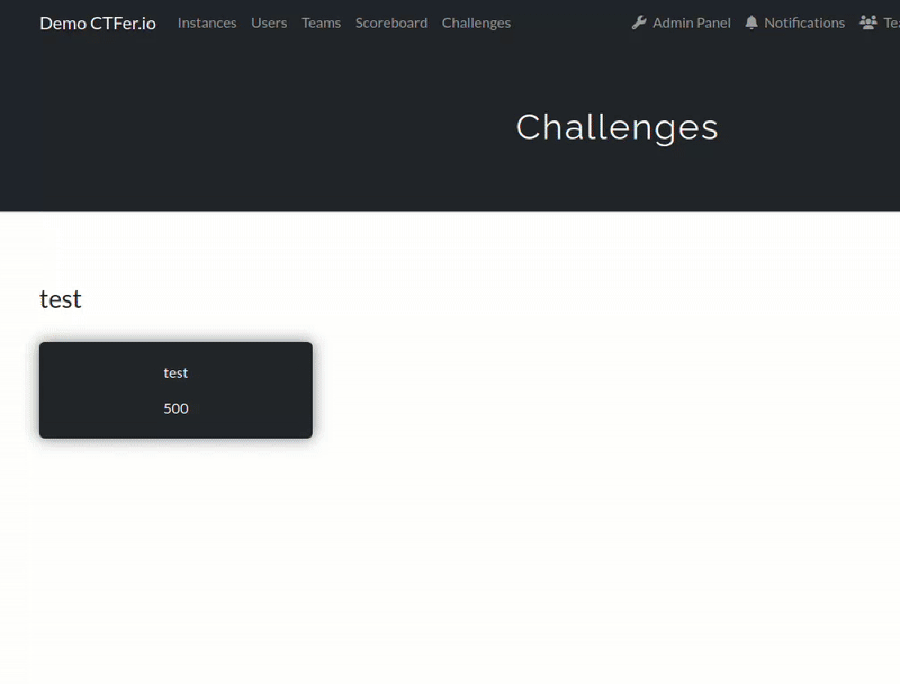
- Go to the Challenges page;
- Deploy a challenge instance:
How Does It Work?
By following the steps above, we’ve deployed an instance of pandatix/license-lvl1:latest on the challenges VM.
Now, let’s break down how it works.
Platform Setup
Vagrantfile: creates the two virtual machines and runs the setup scripts located in thescripts/directory;scripts/ctf.sh: installs Docker Compose v2, starts containers defined inscripts/compose.yml, and pushes the scenario fromscenario/to the local registry;scripts/compose.yml: defines all containers needed for the platform;scripts/challenge.sh: installs Docker and exposes the Docker socket onTCP/2375.
What’s in the Compose File?
ctfd: the CTFd platform with the ctfd-chall-manager plugin;chall-manager: API that handles challenge deployment;chall-manager-janitor: cleans up challenges;ctfd-setup: automates basic setup of CTFd;registry: a local OCI registry for storing scenarios and challenge images.
What’s in the Scenario?
The scenario is defined in scenario/main.go, which uses Pulumi and the Docker Provider to deploy Docker images.
You can customize the scenario using additional values in the challenge configuration.
| Variable | Default | Description |
|---|---|---|
image | pandatix/license-lvl1:latest | The Docker image to deploy. |
port | 8080 | The port to expose the container on. |
hostname | localhost | The public address or domain for the connection information. |
protocol_port | tcp | The protocol to forward incoming traffic to. |
protocol_url | http | The protocol used in the connection information. |
docker_host | unix:///var/run/docker.sock | The Docker socket URI (e.g., tcp://192.168.56.11:2375). |
The scenario is compiled and pushed to the local OCI registry by the scripts/ctf.sh script. When creating the challenge in CTFd, reference it with registry:5000/examples/docker:latest.
Note: The final connectionInfo will look like: {protocol_url}://{hostname}:{computed_exposed_port}
How to Deploy a Custom Image?
You can modify the additional configuration to deploy any Docker image.
Let’s say you want to deploy the image anssi/fcsc2023-pwn-robot:latest from Hackropole which exposes port 4000/tcp. You can configure the challenge as follows:
- In Advanced > Challenge configuration, fill the form as below:
hostname:192.168.56.11docker_host:tcp://192.168.56.11:2375image:anssi/fcsc2023-pwn-robot:latestport:4000protocol_url:tcp
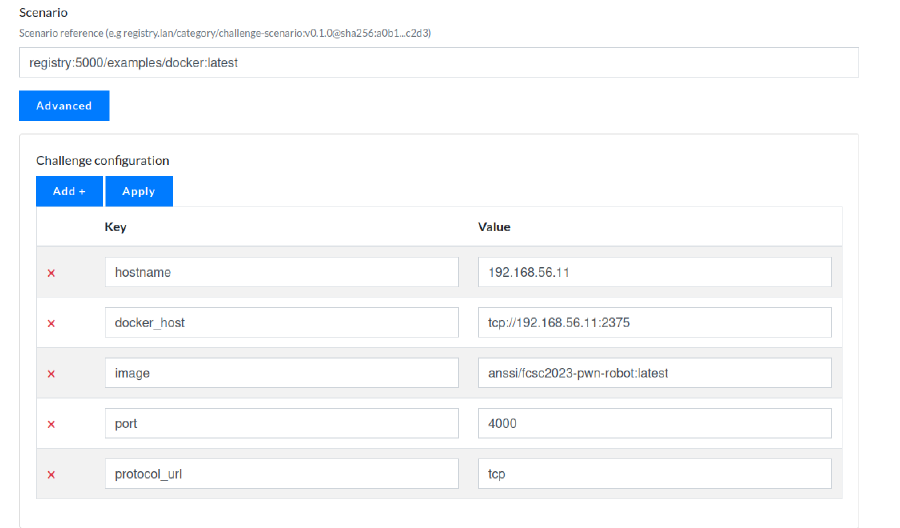
Extract of challenge advanced configuration.
Once deployed, you may receive a URL like: tcp://192.168.56.11:32769
You can connect using netcat: nc 192.168.56.11 32769
It will output something like:
Que faites-vous ?
1: Construire un robot		4: Rédiger le mode d'emploi
2: Le faire parler		5: Afficher le mode d'emploi
3: Jouer avec le robot		6: Admin
0: Quitter
>
Conclusion
Deploying CTFer.io ecosystem on Docker offers a simpler and more accessible alternative for teams who may not be familiar with container orchestration platforms. By relying on lightweight tools like Vagrant, VirtualBox, and Docker, this setup drastically lowers the entry barrier for organizing CTF events, especially in academic or volunteer-led environments.
While it doesn’t provide the full scalability or automation capabilities of a Kubernetes-based infrastructure, it is fully functional, reproducible, and sufficient for many real-world use cases. More importantly, it serves as a solid starting point for teams to understand and experiment with CTFer.io’s ecosystem.
As a future work we’ll work toward adding a specialised SDK in Chall-Manager to cover common Docker deployments, as the one documented per this blog post.